Last Updated On - August 5th, 2024 Published On - Aug 01, 2024
How To Setup WebSocket Communication Among Different Screens with Laravel 11 Pusher & Angular 18?
In this tutorial, we’ll walk through the steps to set up real-time synchronization using Laravel 11 Pusher on an AWS EC2 instance. We’ll deploy a Laravel backend, configure Pusher for broadcasting events, and connect it to an Angular frontend. This setup ensures that any action taken on one screen is immediately reflected on other connected screens.
Example: Real-Time Task Tracker Application with Laravel 11, Pusher and Angular 18
Let us take an example of Real-Time Task Tracker Application to understand Real-Time Synchronization process. In this example, we will create a real-time task tracker application using Laravel 11 for the backend, Angular 18 for the frontend, and Pusher for WebSocket communication. The task tracker will allow users to create, update, and track tasks in real-time, synchronizing the task list across multiple browsers and devices.
Prerequisites
Before we start, make sure you have the following installed:
- PHP
- Composer
- Node.js and npm
- Angular CLI
- An AWS EC2 instance with Ubuntu and Apache (or another server setup)
- Pusher account
Also Read: Laravel 10 Image Compression And Optimization Guide 2024
Step 1: Setup Pusher Account
Create Account
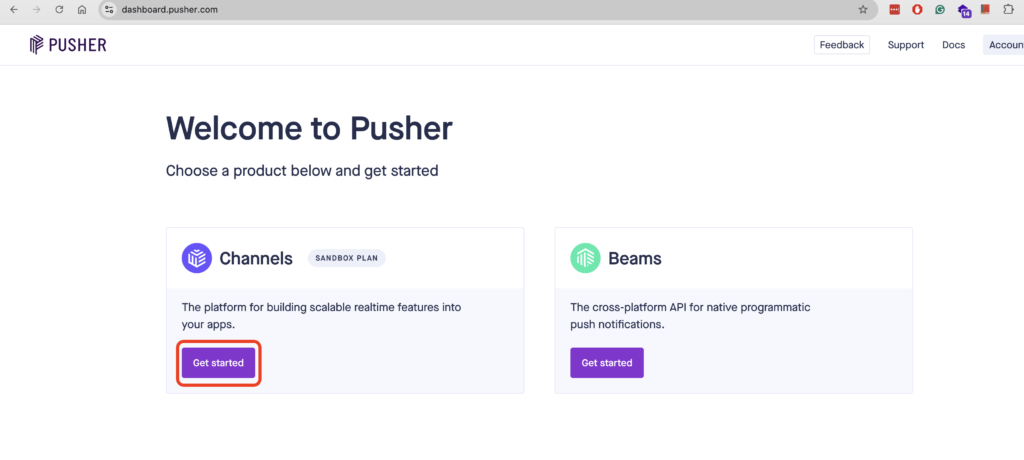
You need to create a Pusher account in order to access their socket communication functionality.
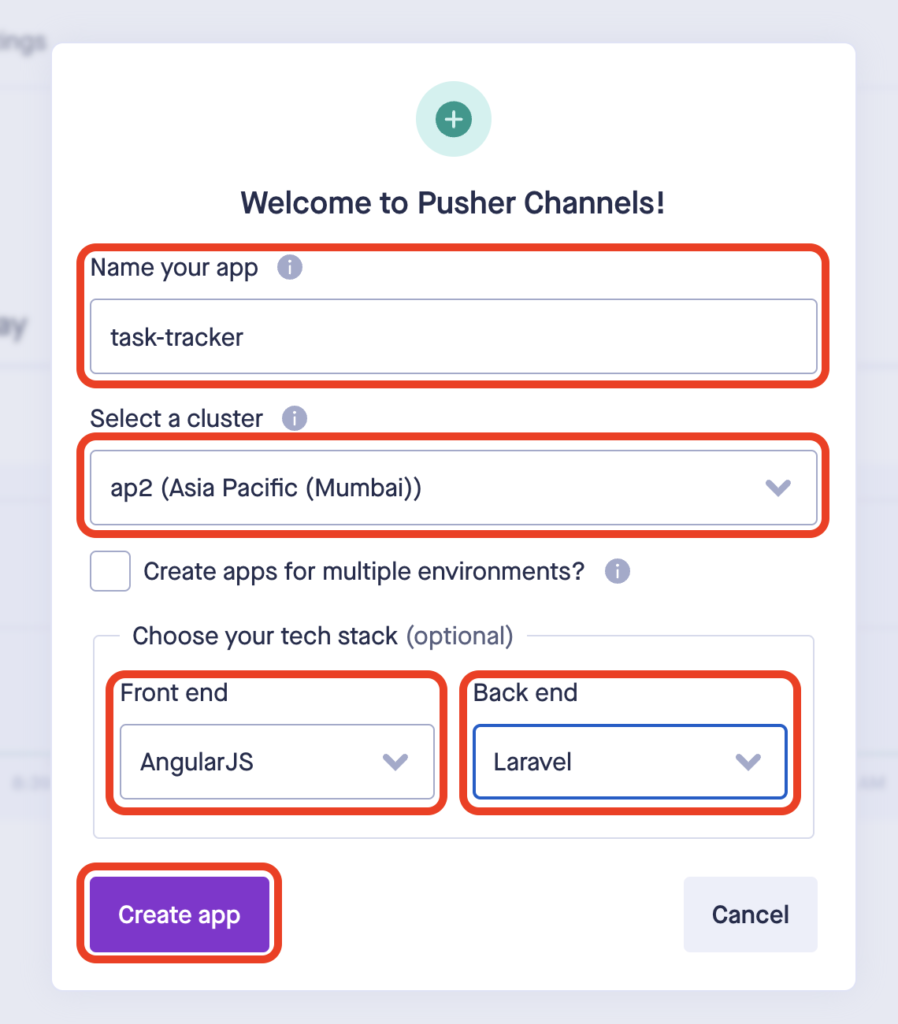
Create a Channel Application
Create a channel application with any name of your choice, server cluster, frontend, and backend tech stack.
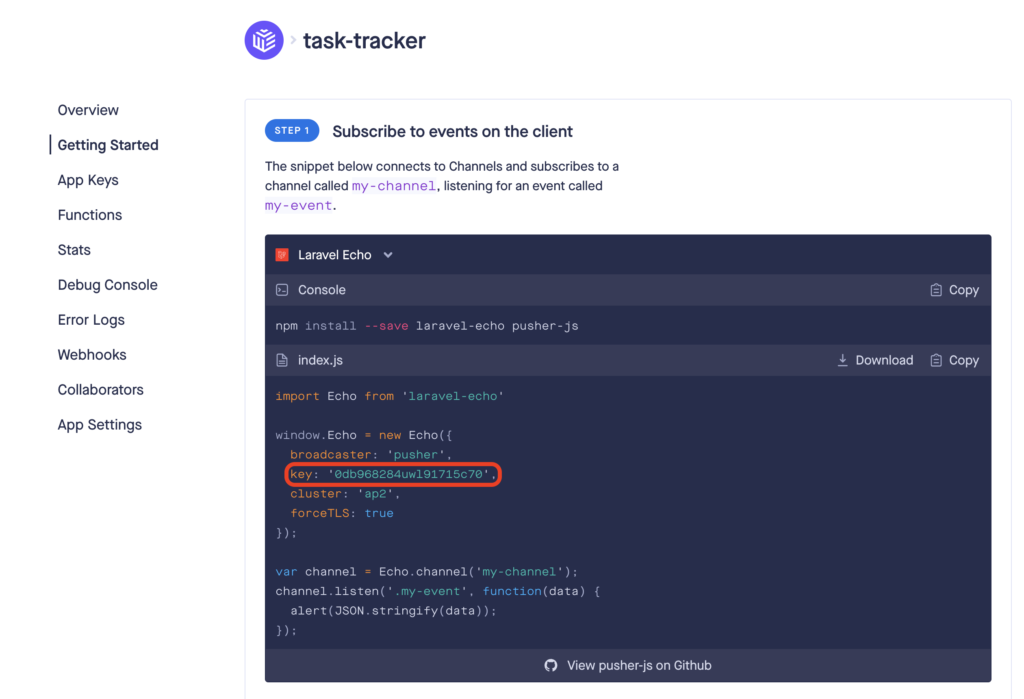
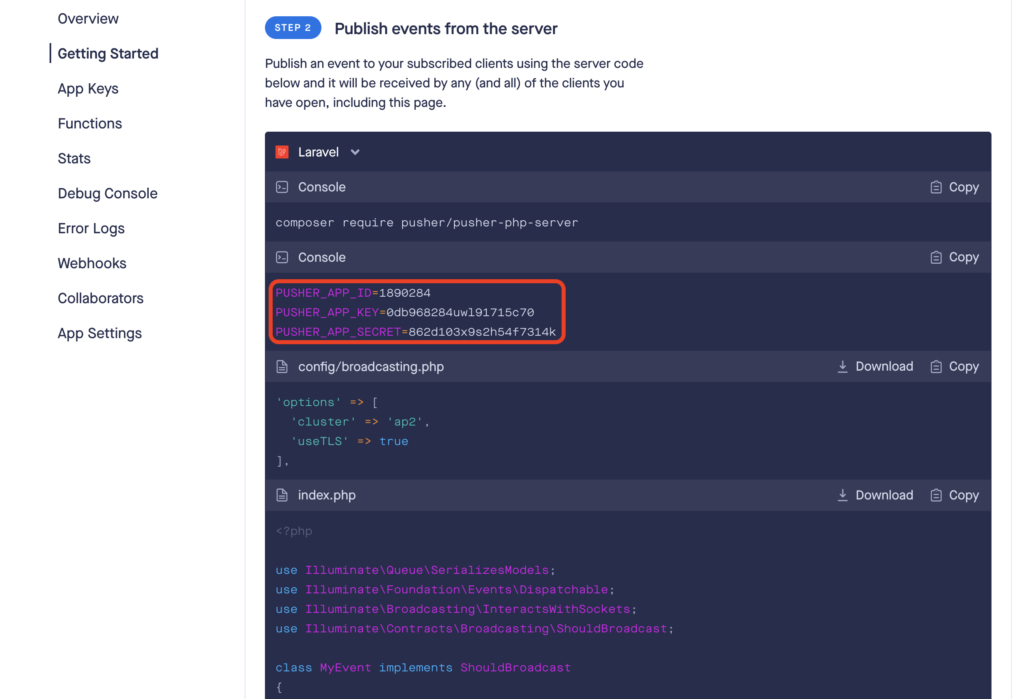
Frontend and Backend Configurations
Once you create app, you will be redirected to getting started page. On this page select your frontend and backend tech stack to get sample code with configuration variables. Note down all the configuration variables(highlighted in the images of sub-sections)
Frontend
As we’re using Angular 18 with Laravel as backend, we need to install laravel-echo and pusher-js via npm.
npm install --save laravel-echo pusher-js
Backend
In laravel we’ve to install pusher-php-server package via composer and save the configuration variables in .env file(explained in further sections)
composer require pusher/pusher-php-server
Step 2: Setting Up the Backend with Laravel
Install Laravel
composer create-project --prefer-dist laravel/laravel task-tracker
cd task-tracker
Configure Environment Variables
Edit your .env file to include your database and Pusher credentials(Highlighted in Backend section of Step1: Setup Pusher Account )
BROADCAST_DRIVER=pusher

PUSHER_APP_ID=your-pusher-app-id
PUSHER_APP_KEY=your-pusher-app-key
PUSHER_APP_SECRET=your-pusher-app-secret
PUSHER_APP_CLUSTER=mt1

DB_CONNECTION=mysql
DB_HOST=127.0.0.1
DB_PORT=3306
DB_DATABASE=task_tracker
DB_USERNAME=root
DB_PASSWORD=
Create Task Model and Migration
php artisan make:model Task -m
Define Task Table Schema
Update the create_tasks_table migration file
public function up()
{
    Schema::create('tasks', function (Blueprint $table) {
        $table->id();
        $table->string('title');
        $table->boolean('completed')->default(false);
        $table->timestamps();
    });
}
Run Migrations
Create a new MySQL database called task_tracker and run the migrations to create tasks table in the database.
php artisan migrate
Create Task Controller With Resource
php artisan make:controller TaskController --resource
Define Task Routes
Add routes to routes/api.php
use App\Http\Controllers\TaskController;

Route::resource('tasks', TaskController::class);
Implement TaskController Methods
namespace App\Http\Controllers;

use App\Events\TaskUpdated;
use App\Models\Task;
use Illuminate\Http\Request;

class TaskController extends Controller
{
    public function index()
    {
        return Task::all();
    }

    public function store(Request $request)
    {
        $task = Task::create($request->all());
        event(new TaskUpdated('create', $task));
        return $task;
    }

    public function update(Request $request, Task $task)
    {
        $task->update($request->all());
        event(new TaskUpdated('update', $task));
        return $task;
    }

    public function destroy(Task $task)
    {
        $task->delete();
        event(new TaskUpdated('delete', $task));
        return response()->json(null, 204);
    }
}
Create TaskUpdated Event
Create a TaskUpdate event to broadcast the data to all connected devices
php artisan make:event TaskUpdated
namespace App\Events;

use App\Models\Task;
use Illuminate\Broadcasting\Channel;
use Illuminate\Broadcasting\InteractsWithSockets;
use Illuminate\Broadcasting\ShouldBroadcast;
use Illuminate\Foundation\Events\Dispatchable;
use Illuminate\Queue\SerializesModels;

class TaskUpdated implements ShouldBroadcast
{
    use Dispatchable, InteractsWithSockets, SerializesModels;

    public $action;
    public $task;

    public function __construct($action, Task $task)
    {
        $this->action = $action;
        $this->task = $task;
    }

    public function broadcastOn()
    {
        return new Channel('tasks');
    }
}
Also Read: How to Integrate Google Calendar API Using Laravel 10 to Send Bulk Invites In 2024?
Step 3: Deploy Laravel on AWS EC2 – (Optional)
SSH into your EC2 instance
ssh -i /path/to/your-key.pem ubuntu@your-ec2-public-ip
Install Necessary Software
sudo apt update
sudo apt upgrade -y
sudo apt install -y apache2 libapache2-mod-php php php-cli php-mbstring php-xml php-bcmath php-curl unzip
Install Composer
cd ~
curl -sS https://getcomposer.org/installer -o composer-setup.php
sudo php composer-setup.php --install-dir=/usr/local/bin --filename=composer
Clone your Laravel Project
cd /var/www/html
sudo git clone https://github.com/yourusername/task-tracker.git
cd task-tracker
sudo composer install
sudo cp .env.example .env
sudo php artisan key:generate
Update .env as described in Step 2.2
Set File Permissions
sudo chown -R www-data:www-data /var/www/html/task-tracker
sudo chmod -R 775 /var/www/html/task-tracker/storage
sudo chmod -R 775 /var/www/html/task-tracker/bootstrap/cache
Configure Apache
sudo nano /etc/apache2/sites-available/task-tracker.conf
Add the following content
<VirtualHost *:80>
    ServerAdmin webmaster@localhost
    DocumentRoot /var/www/html/task-tracker/public
    ServerName api.xyz.com

    <Directory /var/www/html/task-tracker>
        Options Indexes FollowSymLinks
        AllowOverride All
        Require all granted
    </Directory>

    <Directory /var/www/html/task-tracker/public>
        Options Indexes FollowSymLinks
        AllowOverride All
        Require all granted
    </Directory>

    ErrorLog ${APACHE_LOG_DIR}/error.log
    CustomLog ${APACHE_LOG_DIR}/access.log combined
</VirtualHost>
Enable the new site and the Apache rewrite module
sudo a2ensite task-tracker.conf
sudo a2enmod rewrite
sudo systemctl restart apache2
Also Read: How To Install Supervisor Amazon Linux 2023?
Step 4: Setting Up the Frontend with Angular
Create an Angular Project
ng new task-tracker-frontend
cd task-tracker-frontend
Install Laravel Echo and Pusher
npm install --save laravel-echo pusher-js
Create Echo Service
Create a new service to initialize Echo in your Angular project
import { Injectable } from '@angular/core';
import Echo from 'laravel-echo';
import Pusher from 'pusher-js';

@Injectable({
  providedIn: 'root'
})
export class EchoService {
  public echo: Echo;

  constructor() {
    (window as any).Pusher = Pusher;

    this.echo = new Echo({
      broadcaster: 'pusher',
      key: 'your-pusher-app-key',
      cluster: 'mt1',
      forceTLS: true,
    });
  }
}
Create Task Service
Create a service to handle task-related actions
import { Injectable } from '@angular/core';
import { HttpClient } from '@angular/common/http';
import { Observable } from 'rxjs';
import { EchoService } from './echo.service';

@Injectable({
  providedIn: 'root'
})
export class TaskService {
  constructor(private http: HttpClient, private echoService: EchoService) {}

  getTasks(): Observable<any> {
    return this.http.get('http://api.xyz.com/api/tasks');
  }

  createTask(task: any): Observable<any> {
    return this.http.post('http://api.xyz.com/api/tasks', task);
  }

  updateTask(task: any): Observable<any> {
    return this.http.put(`http://api.xyz.com/api/tasks/${task.id}`, task);
  }

  deleteTask(taskId: number): Observable<any> {
    return this.http.delete(`http://api.xyz.com/api/tasks/${taskId}`);
  }

  listenForTaskUpdates(callback: (data: any) => void) {
    this.echoService.echo.channel('tasks').listen('TaskUpdated', callback);
  }
}
Create Task Component
import { Component, OnInit } from '@angular/core';
import { TaskService } from './task.service';

@Component({
  selector: 'app-task',
  templateUrl: './task.component.html',
  styleUrls: ['./task.component.css']
})
export class TaskComponent implements OnInit {
  tasks: any[] = [];
  newTask: any = { title: '', completed: false };

  constructor(private taskService: TaskService) {}

  ngOnInit(): void {
    this.loadTasks();

    this.taskService.listenForTaskUpdates((data: any) => {
      this.handleTaskUpdate(data);
    });
  }

  loadTasks() {
    this.taskService.getTasks().subscribe(tasks => {
      this.tasks = tasks;
    });
  }

  addTask() {
    this.taskService.createTask(this.newTask).subscribe(task => {
      this.tasks.push(task);
      this.newTask = { title: '', completed: false };
    });
  }

  updateTask(task: any) {
    this.taskService.updateTask(task).subscribe();
  }

  deleteTask(taskId: number) {
    this.taskService.deleteTask(taskId).subscribe(() => {
      this.tasks = this.tasks.filter(task => task.id !== taskId);
    });
  }

  handleTaskUpdate(data: any) {
    const task = data.task;
    switch (data.action) {
      case 'create':
        this.tasks.push(task);
        break;
      case 'update':
        const index = this.tasks.findIndex(t => t.id === task.id);
        if (index !== -1) {
          this.tasks[index] = task;
        }
        break;
      case 'delete':
        this.tasks = this.tasks.filter(t => t.id !== task.id);
        break;
    }
  }
}
Add Task Component Template
<div>
  <h1>Task Tracker</h1>
  <ul>
    <li *ngFor="let task of tasks">
      <input type="checkbox" [(ngModel)]="task.completed" (change)="updateTask(task)">
      {{ task.title }}
      <button (click)="deleteTask(task.id)">Delete</button>
    </li>
  </ul>
  <input [(ngModel)]="newTask.title" placeholder="New task">
  <button (click)="addTask()">Add Task</button>
</div>
By following these steps, you will have a real-time task tracker application where tasks can be created, updated, and deleted in real-time, synchronizing the task list across multiple devices and browsers. This tutorial covers the setup and deployment of both the backend with Laravel and the frontend with Angular, using Pusher for real-time communication.